
How to patch a flat tire step-by-step

A flat tire can happen at the most inconvenient times, turning an ordinary day into an emergency. Whether you are on a road trip or heading to work, knowing how to fix a flat tire can save you time and stress. This guide is designed to equip you with the essential steps and tools needed for a successful tire patching.
Understanding the importance of addressing a flat tire promptly is crucial. Driving on a flat can cause further damage to your vehicle, making the situation even worse. In this article, we’ll walk you through a detailed, step-by-step process that will enable you to fix a flat tire efficiently and safely.
From gathering the right tools to executing the patching process, every step matters. By the end of this guide, you will feel confident in your ability to handle a tire emergency and ensure that you can hit the road again without the fear of unexpected breakdowns.
Identifying the Cause and Location of the Leak
Before proceeding with a repair, it’s crucial to identify the cause and location of the flat tire. Start by visually inspecting the tire for any obvious signs of damage, such as punctures, cuts, or embedded objects like nails or glass. These visible indicators can often reveal the source of the leak.
Next, check the tire pressure using a pressure gauge. An abnormally low reading can confirm that a leak exists. If you suspect a puncture but cannot find any visible damage, listen closely for any hissing sounds that might indicate air escaping from the tire. Alternatively, immerse the tire in water; bubbles will form at the leak’s location, providing a clear indication of where the air is escaping.
If you encounter a more complicated situation such as a slow leak, inspect the sidewalls and the area around the valve stem. Sometimes, damage in these areas can be less apparent but still significant enough to require emergency repair. Once you have pinpointed the source of the leak, you can proceed with the necessary steps to patch the tire effectively.
Preparing the Tire and Tools for Repair
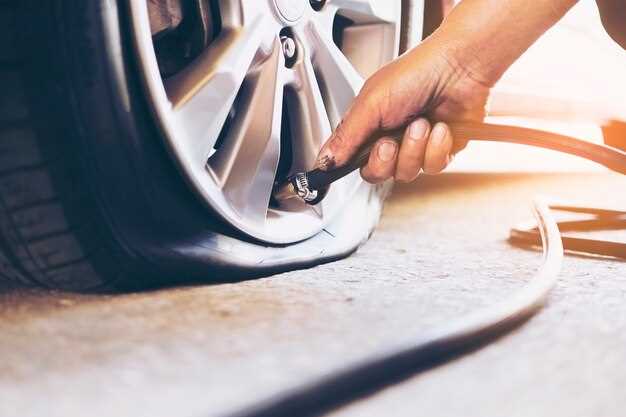
Before starting the repair process for a flat tire, it’s essential to gather the necessary tools and prepare the tire itself. Begin by ensuring you have the following tools ready: a tire iron, a jack, a patch kit, and an air pump. Having these items organized and accessible will streamline your repair efforts in an emergency situation.
Next, make sure to find a safe and level surface to perform the repair. If you’re on the roadside, turn on your hazard lights and set up warning triangles to alert other drivers. Carefully remove the hubcap, if necessary, to access the lug nuts. Loosen the lug nuts slightly with the tire iron, but do not remove them completely at this stage.
Using the jack, lift the vehicle off the ground until the flat tire is clear. Once elevated, completely remove the loosened lug nuts and take off the flat tire. Inspect the tire for visible damage, such as punctures or tears. This will help you determine the appropriate method for repair.
Prepare your patch kit by reading the instructions provided. Familiarize yourself with the process, as different kits may have varying steps. Once you are ready, clean the punctured area of the tire thoroughly using a scraper or a cloth. This ensures proper adhesion of the patch.
After cleaning the area, follow the manufacturer’s instructions for applying the patch. Once completed, reattach the tire by placing it back onto the wheel hub. Hand-tighten the lug nuts to hold the tire in place while your vehicle is lifted.
Finally, lower the vehicle back to the ground and securely tighten the lug nuts in a crisscross pattern to ensure even pressure. After confirming that everything is secure, reinflate the tire to the recommended pressure, and your flat tire repair should be complete. Make sure to store all tools and the flat tire safely in your vehicle for future reference.
Executing the Patch and Ensuring a Reliable Seal

Once you have identified the puncture in your flat tire, it’s time to execute the patch. Begin by cleaning the area around the puncture thoroughly. Use a wire brush or a similar tool to remove any debris and roughen the surface to enhance adhesion. This step is crucial as it ensures the patch can form a reliable seal with the tire material.
Next, select a patch suitable for the size and type of puncture you are dealing with. Make sure the patch is designed specifically for tire repair; using a patch intended for other purposes may compromise the effectiveness of your emergency repair.
Before applying the patch, spread a thin layer of tire adhesive over the punctured area. This adhesive acts as a bonding agent between the patch and tire, ensuring a secure hold. Be careful to cover the area evenly without overdoing it, as excess adhesive can create a mess and potentially weaken the repair.
Carefully place the patch onto the adhesive-covered area, pressing down firmly. Use a rolling tool or your hands to apply pressure evenly across the surface of the patch. This will help eliminate air bubbles and ensure it adheres well to the tire. Allow the patch to set according to the manufacturer’s instructions, typically for at least 15 minutes.
After the patch has cured, perform a visual inspection to ensure it is properly seated and there are no visible gaps. It is also advisable to conduct an air pressure test. Inflate the tire to the recommended PSI and listen for any hissing sounds indicating a leak. If all is well, your tire should be ready for use, providing a reliable seal that will keep you safe on the road.