
How to change your oil at home

Changing your car’s oil at home can be an incredibly rewarding diy project. Not only does it save you money by eliminating the need for a professional service, but it also gives you a sense of accomplishment as you take charge of your vehicle’s maintenance. By following a few simple steps, you can successfully change your oil and ensure your engine operates smoothly.
The process may seem daunting at first, but with the right tools and a bit of guidance, you can transform it into a straightforward task. Knowing the necessary materials and understanding the steps involved will empower you to tackle this essential maintenance procedure on your own. Whether you’re a seasoned car enthusiast or a curious beginner, changing your oil at home can enhance your understanding of your vehicle and its needs.
In this article, we will provide you with a detailed, step-by-step guide on how to change your oil effectively. From gathering the required supplies to the final clean-up, these simple steps will help you gain confidence in your abilities while keeping your vehicle in top condition.
Gathering the Right Tools and Supplies for Your Oil Change
When preparing for a DIY oil change, having the correct tools and supplies is essential to ensure the process is smooth and effective. Start by acquiring a quality oil filter wrench. This tool will help you remove the old oil filter with ease, preventing any unnecessary spills or damage to the surrounding components.
Next, you will need a socket wrench set, ideally with a ratchet and extension, to loosen the oil drain plug. Make sure to select the appropriate size to avoid stripping the plug. Additionally, a sturdy oil catch pan is crucial for collecting the old oil as you drain it from your vehicle, keeping your workspace clean.
Don’t forget to have new oil on hand. Check your vehicle’s owner manual for the correct type and amount of oil needed for your specific model. It’s advisable to choose high-quality oil that meets or exceeds industry standards to ensure optimal engine performance.
Also, include a new oil filter in your supplies. Ensuring a proper seal with a new filter is vital for maintaining oil pressure and avoiding leaks. It’s common practice to apply a little new oil to the gasket of the new filter before installation to create a better seal.
Lastly, safety gear should not be overlooked. Wear gloves to protect your hands from oil and other contaminants, and consider using safety goggles to shield your eyes from any spills or debris. By gathering the right tools and supplies, you will set yourself up for a successful oil change, ensuring that your engine continues to run smoothly.
Draining Old Oil and Replacing the Oil Filter
Draining old oil and replacing the oil filter are crucial steps in a DIY oil change process. To begin, ensure that you have the necessary tools: an oil catch pan, a wrench, and an oil filter wrench. Park your vehicle on a flat surface, and engage the parking brake for safety.
Start by warming up the engine for a few minutes. This helps the oil to drain more easily by reducing its viscosity. Once warmed, turn off the engine and allow it to sit for a few minutes to cool slightly, but not completely.
Position the oil catch pan beneath the oil pan and remove the oil drain plug using a wrench. Be cautious, as the oil may still be warm. Let the oil completely drain into the pan. This process may take several minutes, so patience is key.
After draining the old oil, locate the oil filter, which is usually found on the side or bottom of the engine. Use the oil filter wrench to unscrew the old oil filter. Keep the catch pan underneath to catch any remaining oil that may spill out.
Before installing the new oil filter, apply a small amount of new oil to the rubber gasket on the top of the filter. This helps create a better seal and makes it easier to remove during the next oil change. Screw the new oil filter into place by hand until snug, but avoid over-tightening.
Once the filter is secured, replace the drain plug to prevent any leaks. Tighten it using the wrench, ensuring it is secure but not excessively tight. With everything in place, you’re ready to follow up with adding new oil to complete the DIY oil change.
Adding New Oil and Ensuring Proper Levels
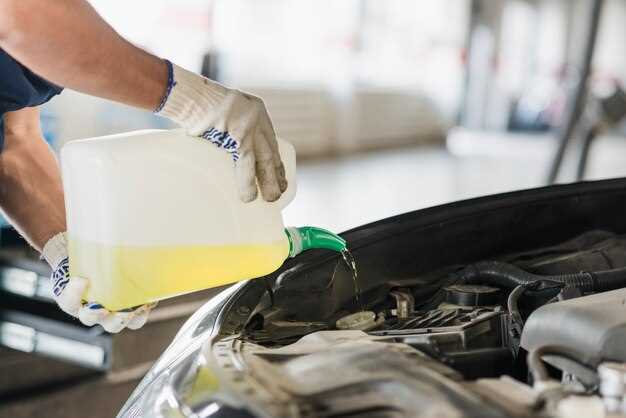
After you have successfully drained the old oil and replaced the oil filter, it is time to add new oil to your engine. Choosing the right type and viscosity of oil is crucial for optimal engine performance. Refer to your vehicle’s manual for the specifications recommended by the manufacturer.
Begin by locating the oil filler cap, typically found on the top of the engine. Remove the cap and use a funnel to pour in the new oil. This step is particularly important for those engaging in a DIY oil change, as it helps prevent spills and ensures a smooth pouring process.
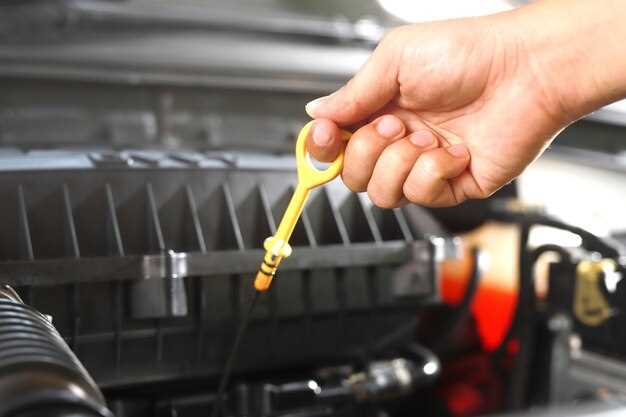
After pouring in a small amount of oil, pause to check the oil level using the dipstick. To do this, insert the dipstick back into its tube and then remove it again. Wipe it clean with a cloth, reinsert it, and remove it once more. This will provide you with an accurate reading of the oil level.
If the oil level is below the recommended mark, gradually add more oil, checking the level frequently to avoid overfilling. Overfilling can lead to increased pressure and potential engine damage. A good practice is to add oil in increments, usually about half a quart at a time.
Once the oil level is within the acceptable range, replace the oil filler cap securely. Start the engine and allow it to run for a few minutes, then turn it off and wait a minute. Afterward, recheck the oil level with the dipstick once again to ensure that it remains within the recommended range.
By following these steps, you can ensure that your vehicle has the correct amount of fresh oil, keeping it running smoothly and efficiently.