
How a timing belt works and when to replace it

The timing belt plays a crucial role in the operation of an internal combustion engine. It is responsible for synchronizing the rotation of the crankshaft and camshaft, ensuring that the engine’s valves open and close at the correct times during each cylinder’s intake and exhaust strokes. This precise timing is vital for optimal engine performance and efficiency.
Over time, timing belts are subject to wear and tear due to heat, stress, and exposure to engine fluids. It is essential to understand when to replace a timing belt to prevent significant engine damage. Most manufacturers recommend specific intervals for replacement, typically ranging from 60,000 to 100,000 miles, depending on the vehicle model and driving conditions. Ignoring these recommendations can lead to belt failure, which may result in catastrophic engine failure and costly repairs.
In this article, we will delve into the intricacies of timing belts, their function within an engine, and the signs that indicate it may be time for a replacement. By gaining a deeper understanding of timing belts and adhering to proper maintenance schedules, vehicle owners can help ensure the longevity and reliability of their engines.
Understanding Timing Belts and Their Replacement
A timing belt is a crucial component in an internal combustion engine, ensuring that the engine’s valves open and close at the correct times in relation to the position of the piston. This synchronization is vital for the efficient operation of the engine and helps prevent serious mechanical failures.
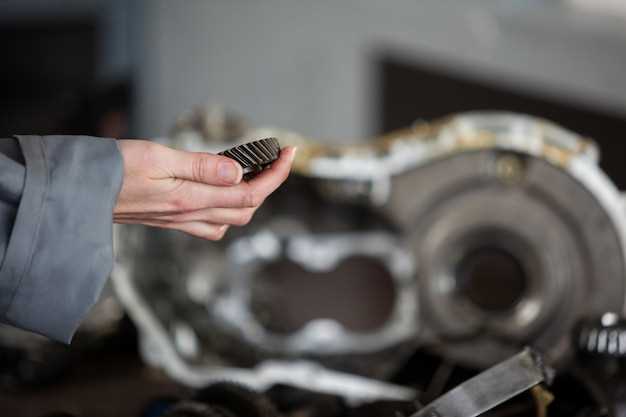
Typically made from a durable rubber material with high tensile strength, timing belts have teeth that grip the pulleys connected to the crankshaft and camshaft. This design allows for precise control of the engine’s timing.
Importance of Replacement:
- A timing belt is subject to wear and tear over time, which can lead to stretching and eventual failure.
- Failure to replace a timing belt at the recommended intervals can result in significant engine damage, potentially costing thousands of dollars in repairs.
- Regular replacement contributes to overall engine performance and reliability.
Replacement Intervals:
- Most manufacturers recommend replacing the timing belt every 60,000 to 100,000 miles, but it is essential to consult the vehicle’s owner manual for specific guidance.
- Factors such as driving conditions, engine design, and belt material can influence replacement intervals.
- Signs that a replacement might be necessary include visible cracks, fraying, or a squeaking noise from the engine.
Replacement Process:
- Ensure the engine is cool and disconnect the battery.
- Remove any components obstructing access to the timing belt.
- Align the timing marks on the crankshaft and camshaft to retain engine timing.
- Carefully remove the old timing belt.
- Install the new timing belt, ensuring it is tensioned correctly.
- Reassemble components and reconnect the battery.
In conclusion, understanding timing belts and recognizing the importance of their timely replacement is essential for maintaining engine health and avoiding costly repairs. Regular inspections and adhering to manufacturer recommendations can help ensure the longevity and performance of your vehicle.
Identifying Signs of Timing Belt Wear and Damage
Timing belts play a crucial role in ensuring the proper function of an engine. Over time, wear and tear can compromise their integrity, leading to potential failure. Regular inspection and awareness of the signs of damage are essential for timely replacement.
One common indicator of a worn timing belt is the presence of cracks or fraying along the surface. These imperfections can be visually inspected during routine engine checks. A belt should appear smooth and intact; any visible signs of deterioration are a red flag.
Another sign to watch for is a change in engine performance. If you notice unusual noises, such as grinding or slapping sounds from the engine area, it may be a symptom of a damaged timing belt. These sounds often indicate that the belt is misaligned or has become loose.
Increased vibrations during engine operation can also signal impending issues with the timing belt. If your vehicle starts to vibrate excessively, it might be due to the belt’s wear affecting the engine’s timing and balance.
Additionally, you may encounter symptoms like an irregular idle or stalling. If the timing belt is not functioning correctly, it can disrupt the engine’s timing and lead to performance problems, including difficulties in starting the vehicle.
It’s important to follow manufacturer recommendations for timing belt replacement intervals. This preventive measure can help avoid sudden failures and costly repairs that result from neglecting signs of wear and damage.
Always consult a professional mechanic if you suspect that your timing belt may be worn or damaged. Early intervention can save you from serious engine problems down the line.
Step-by-Step Guide to Timing Belt Replacement
Replacing a timing belt is crucial for maintaining engine performance and preventing catastrophic failure. Follow this detailed guide to ensure a successful replacement.
1. Gather Necessary Tools and Materials
Before starting, collect the tools required: a socket set, wrenches, a torque wrench, a timing belt kit (including the new belt, tensioner, and idler pulleys), and a repair manual specific to your vehicle make and model.
2. Disconnect the Battery
Safety first: disconnect the negative terminal of the battery to prevent any electrical mishaps during the procedure.
3. Remove Engine Covers
Take off the upper engine cover and, if necessary, the lower cover to access the timing belt area. This may involve unscrewing bolts and clips.
4. Align the Engine to TDC
Turn the crankshaft to set the engine at Top Dead Center (TDC) on the compression stroke for the first cylinder. This ensures proper alignment of the timing marks.
5. Mark Timing Belt Position
Using chalk or a marker, note the position of the old belt relative to the camshaft and crankshaft pulleys. This aids in correctly aligning the new belt.
6. Remove the Old Timing Belt
Loosen the tensioner to relieve tension on the old belt. Carefully remove the belt from the pulleys, noting the route it takes through the engine.
7. Inspect Components
Examine the idler pulleys, tensioner, and water pump (if driven by the timing belt) for wear. Replace any worn components as part of the maintenance process.
8. Install New Timing Belt
Position the new timing belt in accordance with the marks made earlier. Ensure it is tight on the drives but not overly stretched. Follow the manufacturer’s instructions for adjusting tension.
9. Recheck Timing Marks
Double-check that all timing marks are aligned correctly. Incorrect timing can lead to severe engine damage.
10. Reassemble Engine Components
Reattach any components removed earlier in reverse order. Replace engine covers, ensuring all bolts are tightened to manufacturer specifications.
11. Reconnect the Battery and Test
Reconnect the battery and start the engine. Observe for any unusual noises and check that all systems are functioning smoothly. Listen for any signs of belt slippage or misalignment.
12. Final Checks
After running the engine for a few minutes, perform a final inspection of the timing belt and surrounding components. Look for any leaks or abnormal noise before taking the vehicle back on the road.
Maintaining Your Vehicle After Timing Belt Replacement
Once the timing belt replacement is completed, ensuring the longevity and optimal performance of your vehicle is crucial. Regular maintenance plays a significant role in preventing future issues related to the timing system. Start by adhering to the manufacturer’s recommended service intervals to keep the engine running smoothly.
Check the coolant levels and the condition of the water pump, as overheating can compromise the integrity of the new timing belt. Regularly inspect your engine for any unusual noises or vibrations that could indicate misalignment or tension problems. Additionally, pay attention to the timing belt tensioner; a faulty tensioner can lead to premature wear.
Routine oil changes are essential as well. Clean oil lubricates the engine components effectively, reducing friction and wear on the timing belt and associated parts. Use high-quality oil and filters to maximize protection and performance.
A comprehensive visual inspection of surrounding components, including pulleys and guides, can help identify potential issues early on. Any signs of wear or damage should be addressed immediately to avoid complications.
Lastly, maintaining a regular schedule for checking engine performance and conducting diagnostic tests can help in early detection of any underlying problems. By actively maintaining your vehicle after a timing belt replacement, you can enhance reliability and avoid costly repairs in the future.